Digital meets real: 3D Printing
As soon as I started to fiddle around with Processing and Openframeworks back in 2013, I immediately felt the incredible power that their generative approach could offer. The amount of control, the expressivity and the variation of artworks that could be potentially generated felt really overwhelming! But one the most important things that you surely have already witnessed in your creative practice is that having (virtually) no limits can have a huge impact on the quality of your works. Sometimes a constrain or a technical limit are the best way to get inspired!
So, as digital people working with digital tools, how can we introduce some of these healty limits?
Chapter 1. Venturing into the physical world
XY
One easy way is to start printing your works.
Use your own printer, pick a specific format, choose the appropriate paper support and get inspired!
This approach - which is generally a very good practice - does introduce some initial limits.
You have to be careful of the color palette you pick (not everything can be printed), of the legibility of your work from a bigger distance (we all stand at the same distance from a monitor, but with printed stuff there are many different possible angles!) and of the price of each print. Yes, printing can be cheap, but requires some resources, so you'll go through a curatorial process of your works to pick that work best.
You may then start to want to print your stuff using large plotters or professional printers that will guarantee you a higher quality result.
Z
All credits to https://www.xkcd.com/
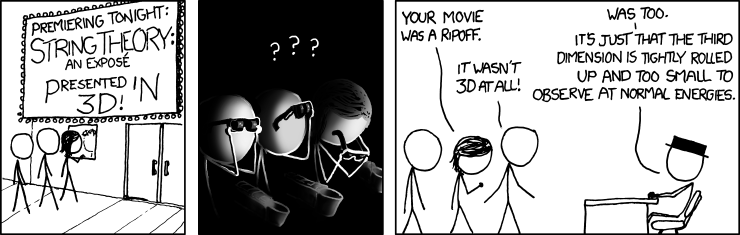
As soon as you feel comfortable within the realms of X and Y, you may start to realize that you're ready to engage with Z.
Not that Z is better or anything like that : she is just trickier to manage properly.
Z is an old friend - you may have played with her many times - but always within the boundaries of your screen, which is completely flat.
Always with the illusion of depth as seen through digital eyes.
Z if full of surprises, as it generally requires you to look for materials (or shaders), lights and a virtual camera.
When you work in Z, your don't specify the size of your sketch anymore.
Your sketch dimensions are infinite.
But your time and resources are not.
There are many ways of turning a 3d mesh into a real object, and all have of them show interesting limits that will change how you approach your next work. All of them require you to think in advance, because making errors will waste your time and your resources.
Chapter 2. Techniques
Given that we live in 2018, the first technique I'll show you to create a tridimensional object is to 3d print it. The other ones will be covered in separate blog posts.
A nice limit that 3d printing enforces on us is the printability of something: since you cannot print in the air, you need to always print on some preexisting part of the piece. So you cannot print bridges floating in the air without adding supports underneath.
You can either use FDM or SLA technology, depending on the kind of machines that you can access.
3D printing: FDM and SLA
FDM printers are generally cheaper, more common and easier to use, so I'll start with them. FDM stands for *Fusion Deposition Modeling*, and printers in this category work by extruding a thermoplastic filament (a long spaghettiii) over different positions, and slowly building an object bottom to top. Since the object is made of layers of this filaments, often you can see them even after a finished print: this is why *generally* fdm printers are used for CAD designed pieces, instead of sculptures (this is not 100% true, in fact you can get pretty awesome results with the rights settings).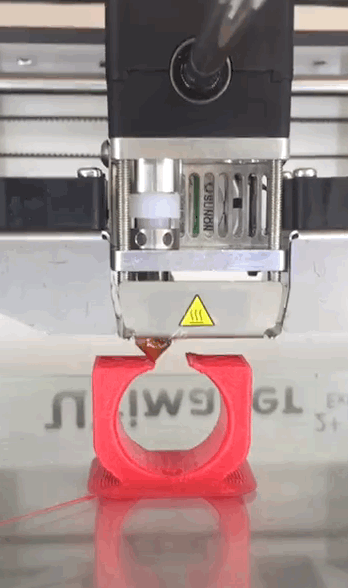
SLA printers instead work by solidifying a resing using pulsating light. Basically the object you're printing sticks to a top plate and gets immersed in the resin, which is solidified layer after layer. They're more suitable for aesthetic parts which require great details.
Due to the way it works, you'll have to orient your flat pieces in strange ways and add lots of supports
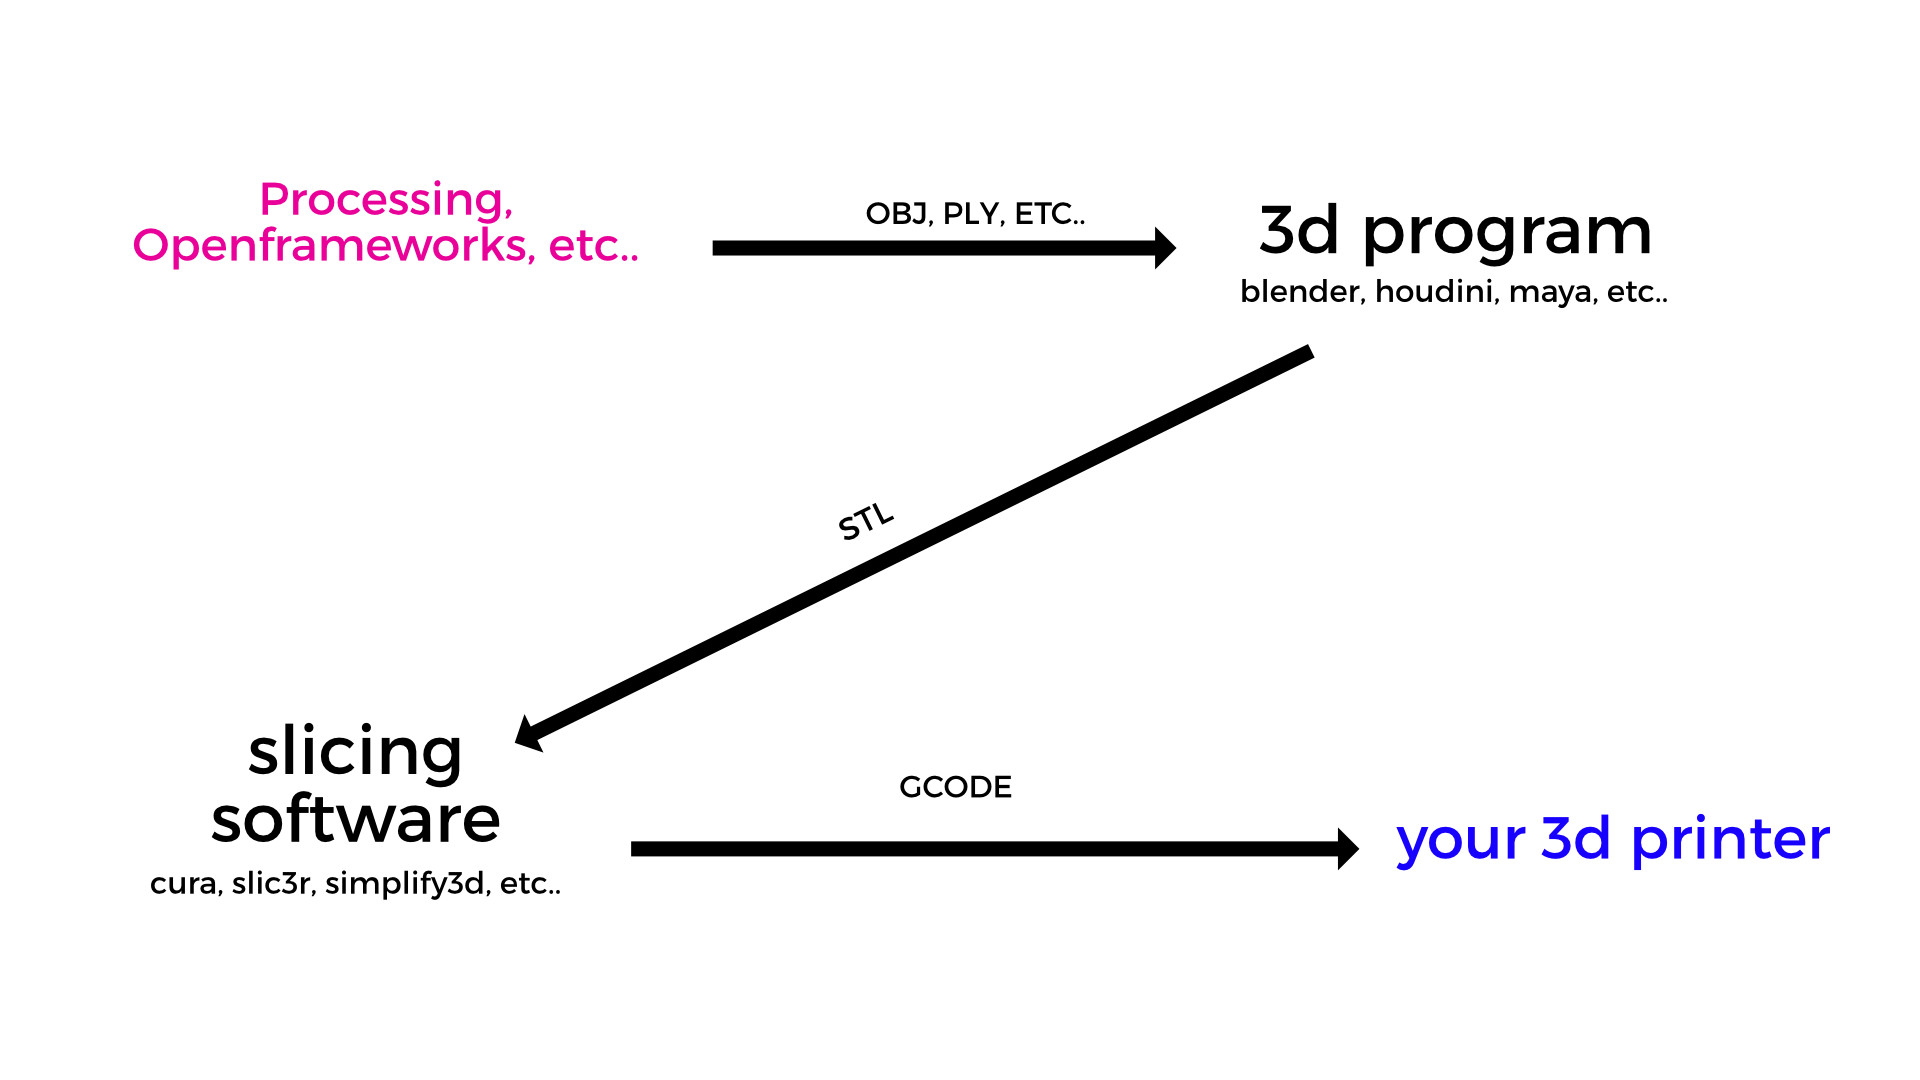
Exporting meshes
But with any printer, you will first need to have an STL file, or something that can be converted to it. So let's see how to export those meshes (a mesh really is just the name for a network of points in space with faces and edges attached to them).Processing
In my experience, if you're using processing the best way is to use a library created by Nervous Systems (which, by the way, do pretty amazing stuff, check their instagram).This is some boilerplate code to do it (credits for the original code go to Lior, my Programming for Artists 2 teacher):
Openframeworks
If you're using OF, you need to build your 3d mesh using an ofMesh object and then you can simply use the builtin ```save()``` method of the ofMesh class: https://openframeworks.cc/documentation/3d/ofMesh/#show_saveYou can also manually export a mesh using this function:
STL Manipulation
At this point you'll either have an .obj or a .ply file.
You may want to make some little tweaks to the mesh using an appropriate program, or maybe you just need to export the STL file for printing. The STL file is what you can actually input in a software (a "slicer") in order to generate the gcode for the 3d printer. It's a very legacy kind of file and maybe the industry will at some point move forward, but for now it's a requirement for every slicer.
The GCODE is the name of the machine code that will make the 3d printer move the stepper motors and everything else in order to produce your print.
For manipulating the actual mesh, I would personally recommend Houdini.
It's a 3d animation package originally built to create Visual Effects for movies, but due to its procedural nature it's very similar to what you do inside processing or openframeworks. You can use code (VEX or Python) or nodes (like MaxMsp, QuartzComposer, VVVV..) in order to edit in a non destructive way your mesh. Non destructive here really means that you don't need to do CMD+Z to go to a previous step, you just need to select the node responsible for the previous edit. An educational version of Houdini is available for free, and it has got some limitations for the rendering but nothing that matters for us too much.
That's how you edit stuff in houdini!
Another good choice is Blender, the famous open source animation package. I would love to love Blender but since I worked with Maya for a long time my head just explodes when I see Blender's GUI. Nonetheless, if you've got a real shoshin you could find it good enough. And finally you can also use MeshMixer, which is more focused on specific tasks and on preparing a file to be 3d printed.
Regarding slicing softwares, you've got tons of options:
- Cura
- Simplify3d
- Slic3r
- Repetier
And so on..
It's really up to you, I've been using Cura for almost a year now and I have no regrets.
It's not my aim to do a full videotutorial on how to use Houdini or Cura, there are plenty of them so just google them! What I wanted to show was a workflow to create something new out of your generative sketches. I hope you learned something and you will try to face the new challenges that only the physical world can set! I will link below some digital artists and studios working with physical mediums, check them out!
A big thanks goes to Lior, one of my professors at Goldsmiths, for getting me into this magical world! :)
Some inspiration
- Anthony Cragg: http://tony-cragg.com
- Andy Lomas: http://www.andylomas.com
- Quayola: http://www.quayola.com
- Nervous System: https://n-e-r-v-o-u-s.com/
- Saskia Freeke: http://sasj.tumblr.com/
Namasté
PS: you can see my first prints here: https://www.instagram.com/p/BiSD_Xln5tk/?taken-by=vvz3n